
Terminal Tips: iTerm2, oh-my-zsh and more
My productivity heavily depends on the tool belt I use. Terminal is not an exception, and I’d like to share my configuration and tweaks.
Let’s go through all the steps I would do if I bought the new laptop and I need to configure everything from scratch.
Use iTerm2
Let’s start from replacing default Terminal.app by iTerm2, feature-packed and easily configurable solution that claimed to “do amazing things”. Can’t disagree with that.
- Download iTerm2
- Read the whole list of its features
Use ZSH and Oh My ZSH
When you start a terminal application, by default it is running a shell called Bash. It’s the most popular shell, but there are alternatives that make using the terminal faster and more comfortable for developers.
My choice is ZSH and ZSH framework - Oh My ZSH. It comes bundled with a lot of helpful functions, helpers and plugins that boost your productivity.
Make Your Terminal Pretty
I tried a lot of ZSH prompt themes and finally stayed with Pure.
- Install Pure
- Install zsh-syntax-highlighting
- Import Snazzy.itermcolors to
Profiles -> Colorsin iTerm2 Settings
Learn iTerm2 Tips & Tricks
Useful Hotkeys
| Keys | Purpose |
|---|---|
Cmd + Shift + H | Show paste history |
Cmd + / | Find current input |
Cmd + D | Split pane horizontally |
Cmd + Shift + D | Split pane vertically |
Cmd + ] | Next pane |
Cmd + [ | Previous pane |
Cmd + + | Increase font size |
Cmd + - | Decrease font size |
Cmd + T | Open new tab |
Cmd + Number | Switch to window |
Cmd + K | Clear buffer |
Open links from terminal
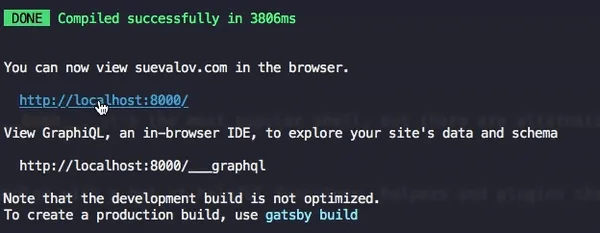
Hold Cmd key while clicking on the link in the terminal. It’s really useful when the output of the command is referring to some external resource.
Different working directories
By default, splitting current screen in iTerm2 gives me new split screen in default location (which is user’s home directory) not in my current location. If you want
to have split screen of the current location you are working in go to Profiles → Working Directory -> Advanced Configuration.
Map keys to jump between words
If you have experienced typing very long command and you want to fix a typo in the middle, there are not that many choices but to keep pressing left arrow key until the cursor reaches where typo happens.
You can jump between words by sending some special characters in shell and iTerm2 can make it easier. You can go to: Keys → Key Mappings and add key mappings you want.
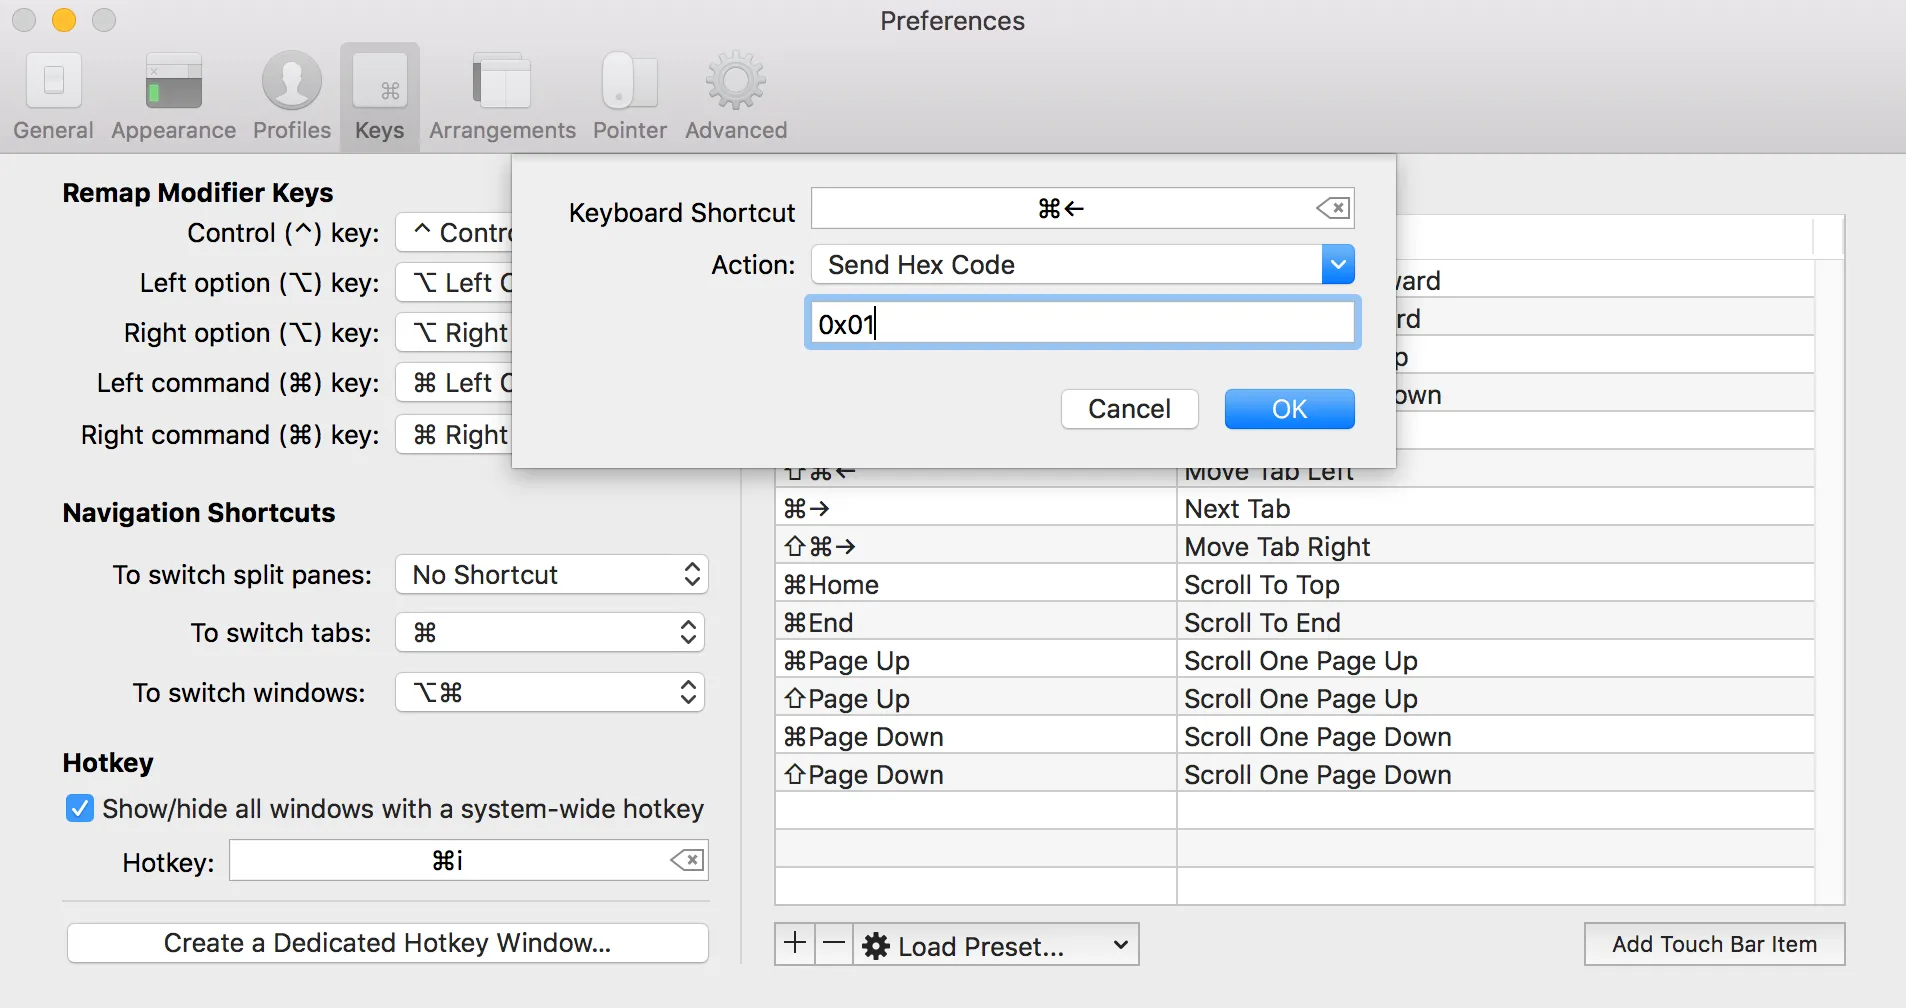
| Keys | Action | Value | Purpose |
|---|---|---|---|
Cmd + ⬅️ | “Send Hex Code” | 0x01 | Jump to beginning of the line |
Cmd + ➡️ | “Send Hex Code” | 0x05 | Jump to end of the line |
Cmd + ⌫ | “Send Hex Code” | 0x15 | Delete current line |
Alt + ⬅️ | “Send Escape Sequence” | b | Jump to beginning of the word |
Alt + ➡️ | “Send Escape Sequence” | f | Jump to end of the word |
Alt + ⌫ | “Send Hex Code” | 0x17 | Delete word |
Non-native fullscreen mode
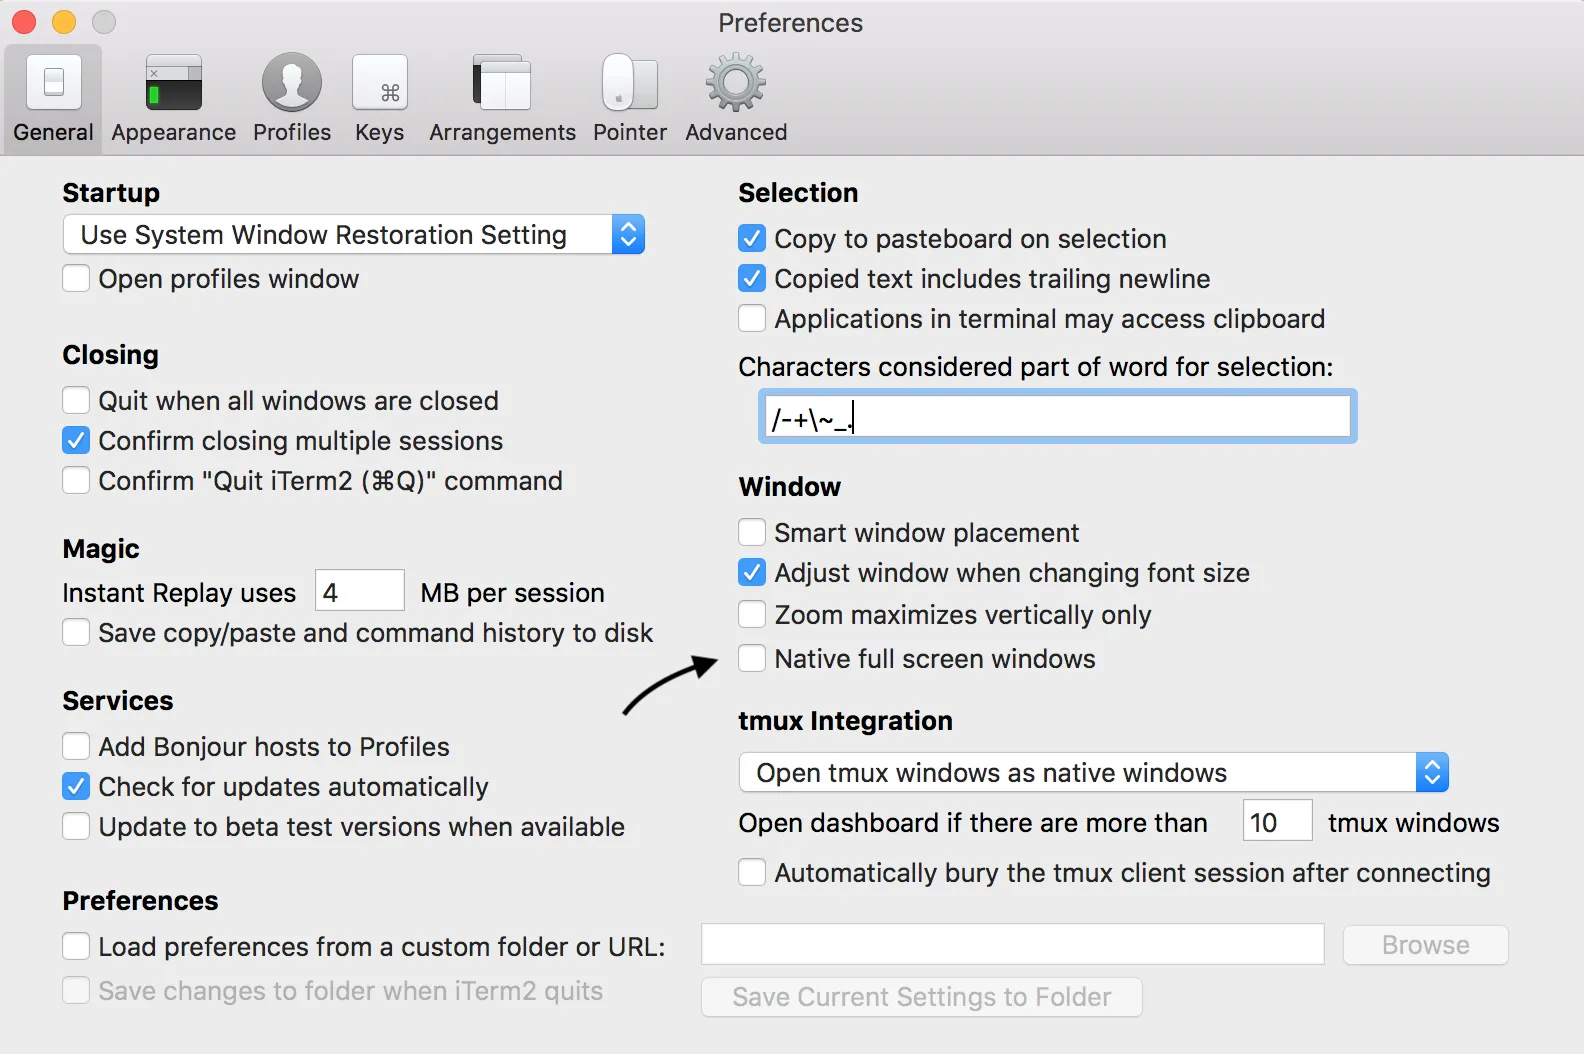
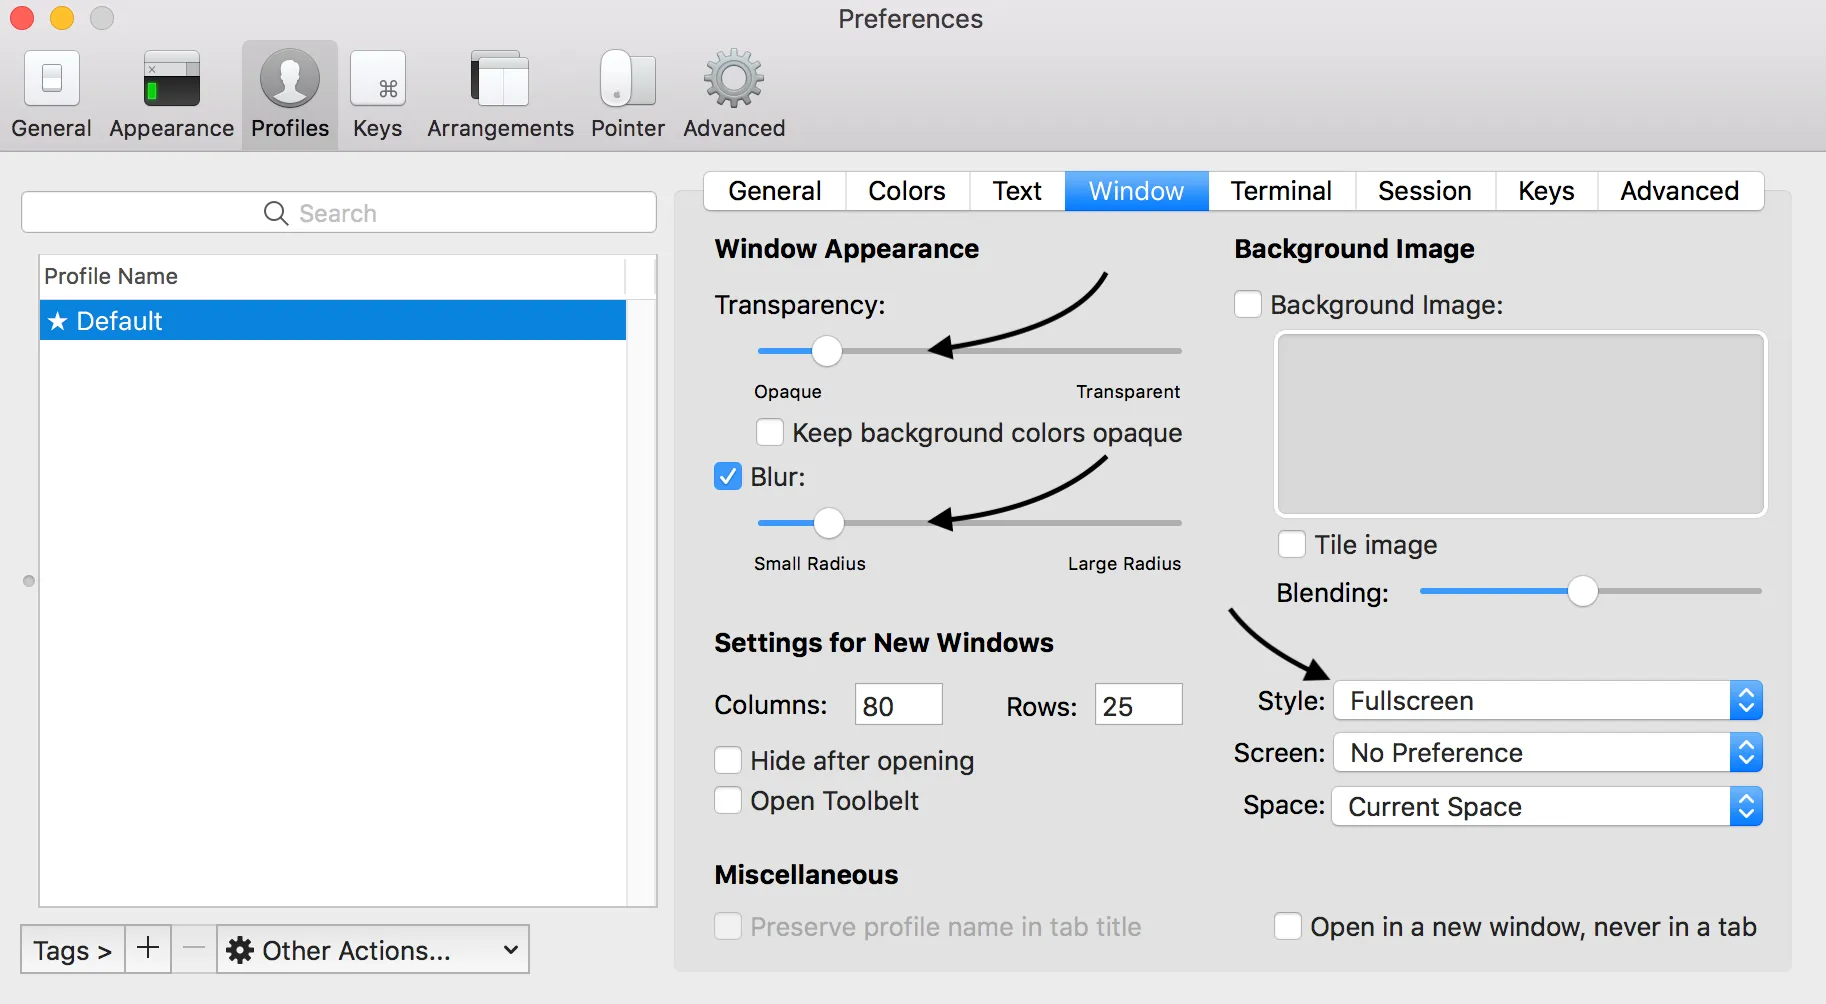
It’s quite controversial step, but it works perfectly for me.
iTerm offers the option to disable “native full screen mode.” This makes it easy to switch back-and-forth between an editor and shell. How? Rather than opening a native full-screen app with the accompanying slow animation, iTerm instantly places a terminal over the desktop.
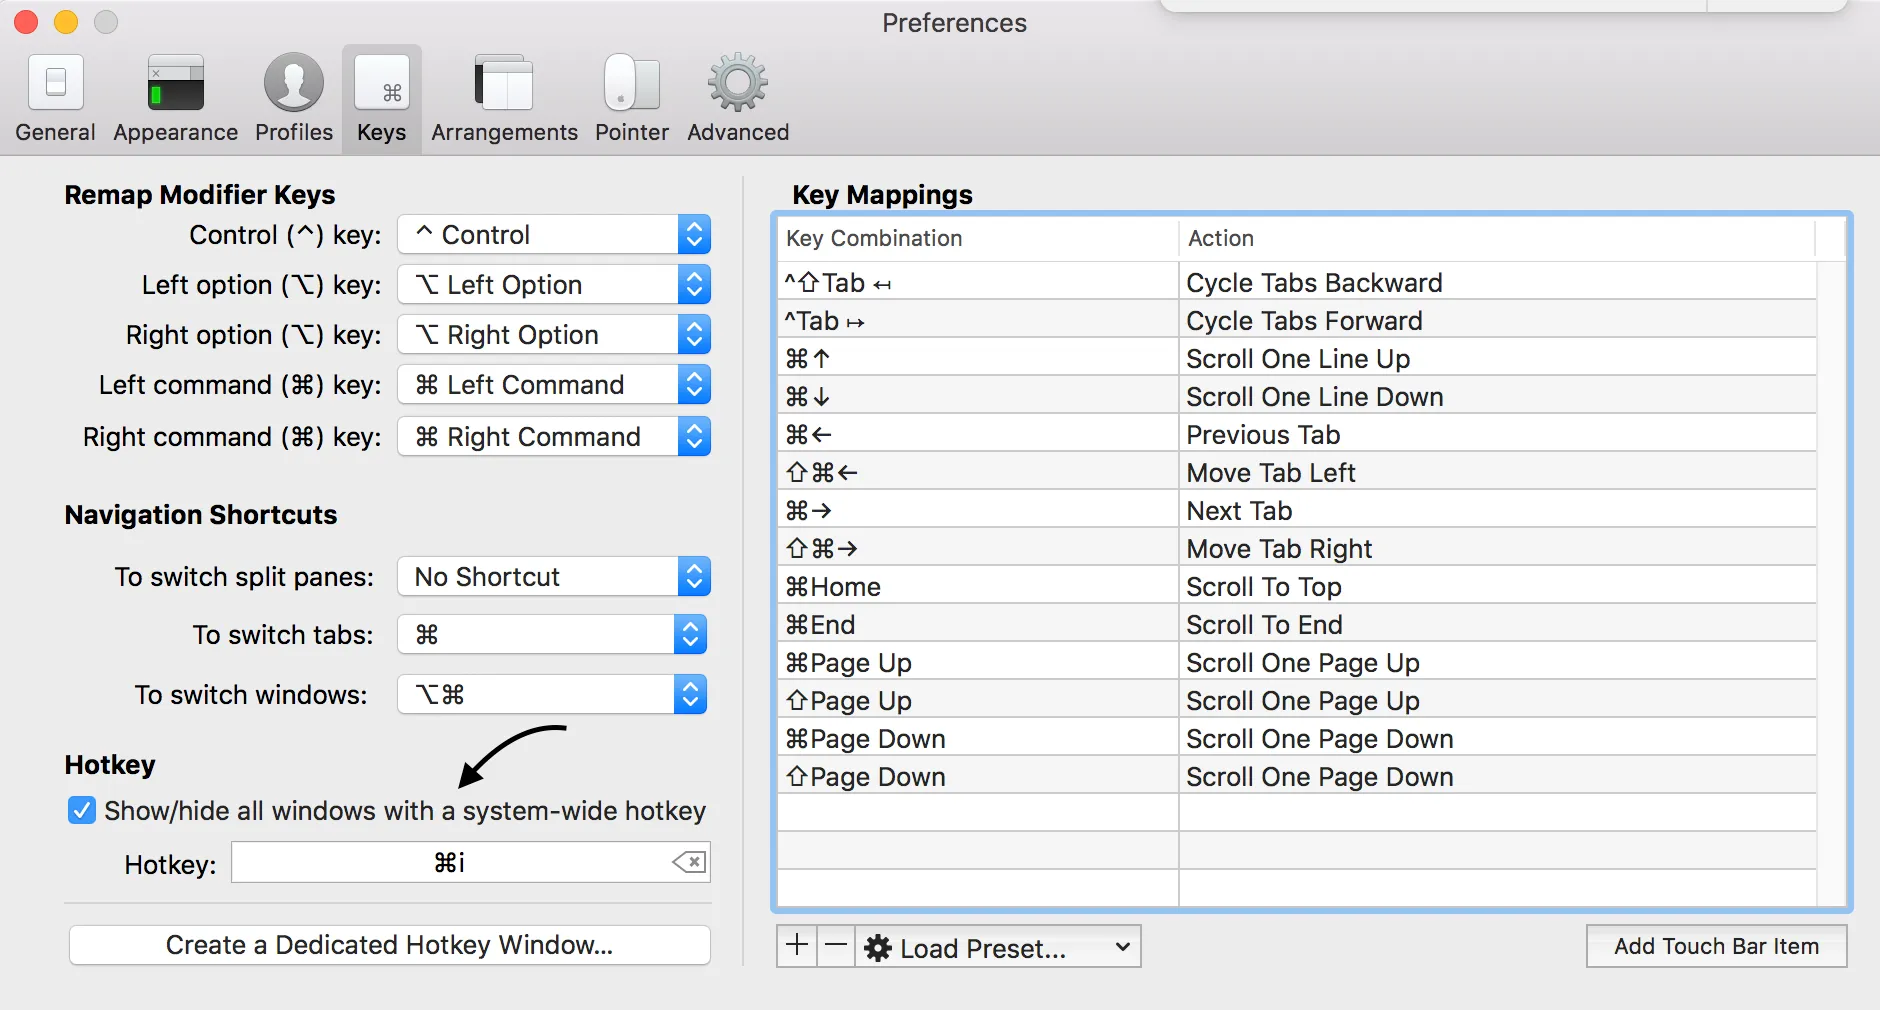
Add Plugins and Aliases
Add your custom aliases and plugins to ~/.zshrc. I use the following things:
# enables my favorite oh-my-zsh plugins
plugins=(git npm node extract yarn)
# instead of 'sudo <command>' you can use 'please <command>'
alias please=sudo
# show only directories
alias lsd='ls -l | grep "^d"'
# show files and directories in as a table
alias ll='ls -alF'
# navigation shortcuts
alias ..='cd ..'
alias ...='cd ../..'
alias ....='cd ../../..'
alias cd..='cd ..'
alias .....='cd ../../../..'
# git aliases and common git typos
alias g='git'
alias gti='git'
alias gi='git'
alias gco='git checkout'
alias gst='git status'
alias gcm='git commit -m'
alias gamend='git commit -a --amend'
alias gdeletemerged='git branch --merged | egrep -v "(^\*|master|dev)" | xargs git branch -d'
# open in browser
alias safari="open -a safari"
alias firefox="open -a firefox"
alias opera="open -a opera"
alias chrome="open -a google\ chrome"
alias canary="open -a google\ chrome\ canary"
# git log find by commit message
glf() { git log --all --grep="$1"; }
# open current folder in finder
alias f='open -a Finder'
# hide/show all desktop icons (useful when presenting)
alias hidedesktop='defaults write com.apple.finder CreateDesktop -bool false && killall Finder'
alias showdesktop='defaults write com.apple.finder CreateDesktop -bool true && killall Finder'More cool CLI that I use
- trash and empty-trash for deleting files
- fkill for convenient killing processes
- imgcat for checking images in terminal
- itermocil for pre-defined window/pane configuration in iTerm2
- thefuck for correcting wrong console commands
- z for jumping around the most used folders
- zsh-yarn-autocompletions for autocompletion of
yarncommands available in your workspace